It's been awhile since I last wrote, and I've had this topic on the backburner for awhile already, so I thought I'd might as well get to it. (Warning: Long Post Ahead )
Split Ergonomic Keyboards
As someone in the world of Software Engineering, I've always been privy to the existence of these strange alien looking keyboards and I can't lie, the benefits and upsides of these have always seemed quite enticing, especially when I consider I would be spending a lot of my time typing and being at the desk for this career. The one thing that always kept me out though, was what I consider pretty high barriers to entry. You have to either go down the very intimidating DIY route where you print and build everything yourself, or drop a bomb on a premade board like the ZSA Voyager (which honestly I still think is a really nice board, but it costs close to $400 USD).
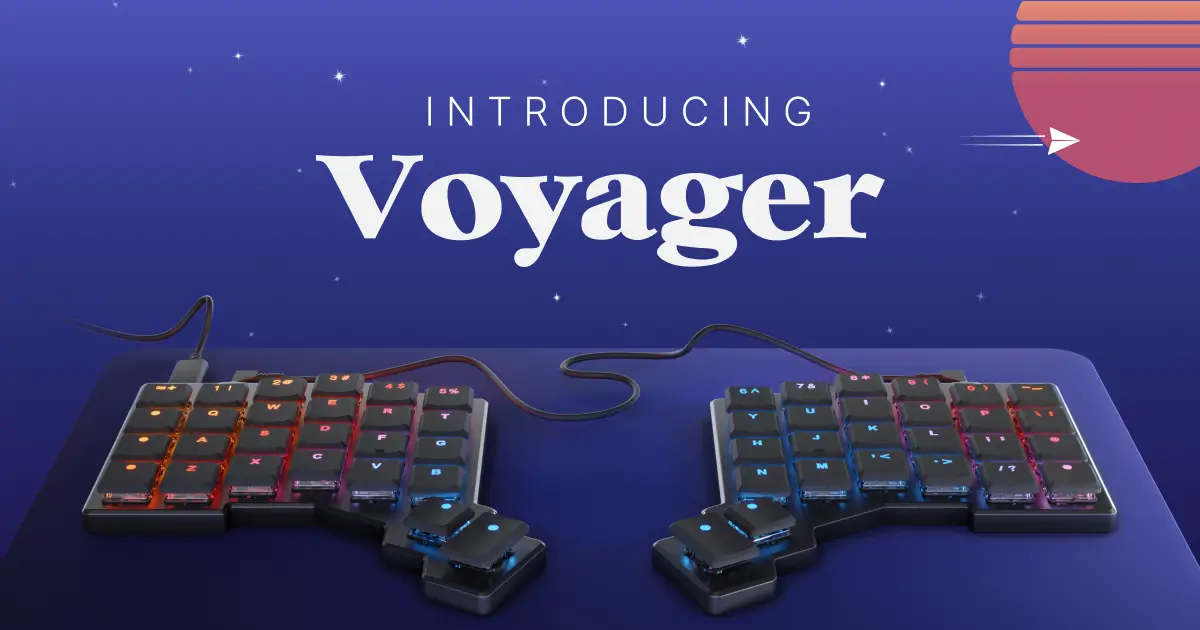
Still, I wanted to reap the benefits of using split ergonomic keyboard, and they looked really cool too, especially those ultra portable low profile boards (like the Voyager). Before I get into my journey, let me just briefly touch on the benefits of these little split ergonomic keyboards.
An Outdated Design
Modern keyboards have their design roots in classic typewriters, where the rows are staggered to prevent the typewriter levers from colliding and the layout is also reflective of that, where commonly used letters are placed further apart to prevent jamming of the levers. We have had literally no innovation in terms of key placement and layout and a design that was once functional has become obsolete for modern electric keyboards, and more importantly for the user.
Modernising
This is where a few of the changes on a modern split ergonomic keyboard aims to improve. Even without looking at the split, the board is noticeably column-staggered instead of row-staggered. This difference is meant to match the way your fingers move, where extending and contracting your fingers match a column, rather than side to side like on row-staggers. The layout can be changed as well to something where the more commonly used letters are closer and on the homerow, like Colemak and Dvorak (but I haven't delved into this side of things yet). To then take things even further, we can consider the split, which is meant to help with angling your wrists and opening up your shoulders. You can even take it a step further and add tenting which is angle the keyboard at an incline to better match your natural hand position (perpendicular to the desk, rather than parallel). I know this all doesn't seem like a big deal, and honestly a regular keyboard is still perfectly fine, but like I said, for someone like me, where I foresee myself spending a significant portion of my future and life at the desk, typing away, I think investments like these just make sense.
Now that I've gone over they whys of these keyboards, let's get into the how.
Aliexpress and My First Split
As I mentioned earlier, you typically have two ways of getting into this hobby, build one yourself, or buy really expensive. It wasn't until recently, for reasons I can't even remember, I stumbled upon quite a number of prebuilts scattered across the Chinese e-commerce site, Aliexpress. I believe they are boards that have been 3D printed and assembled to be sold. The designs are community made designs, they just help to make the materials and put them together. The best part is that they are pretty afforable as well. For example, one of the more popular boards is the Corne, which is a split, 6 column, numrowless keyboard, with a 3 key thumb cluster. They have many of these on sale, for pretty good prices.
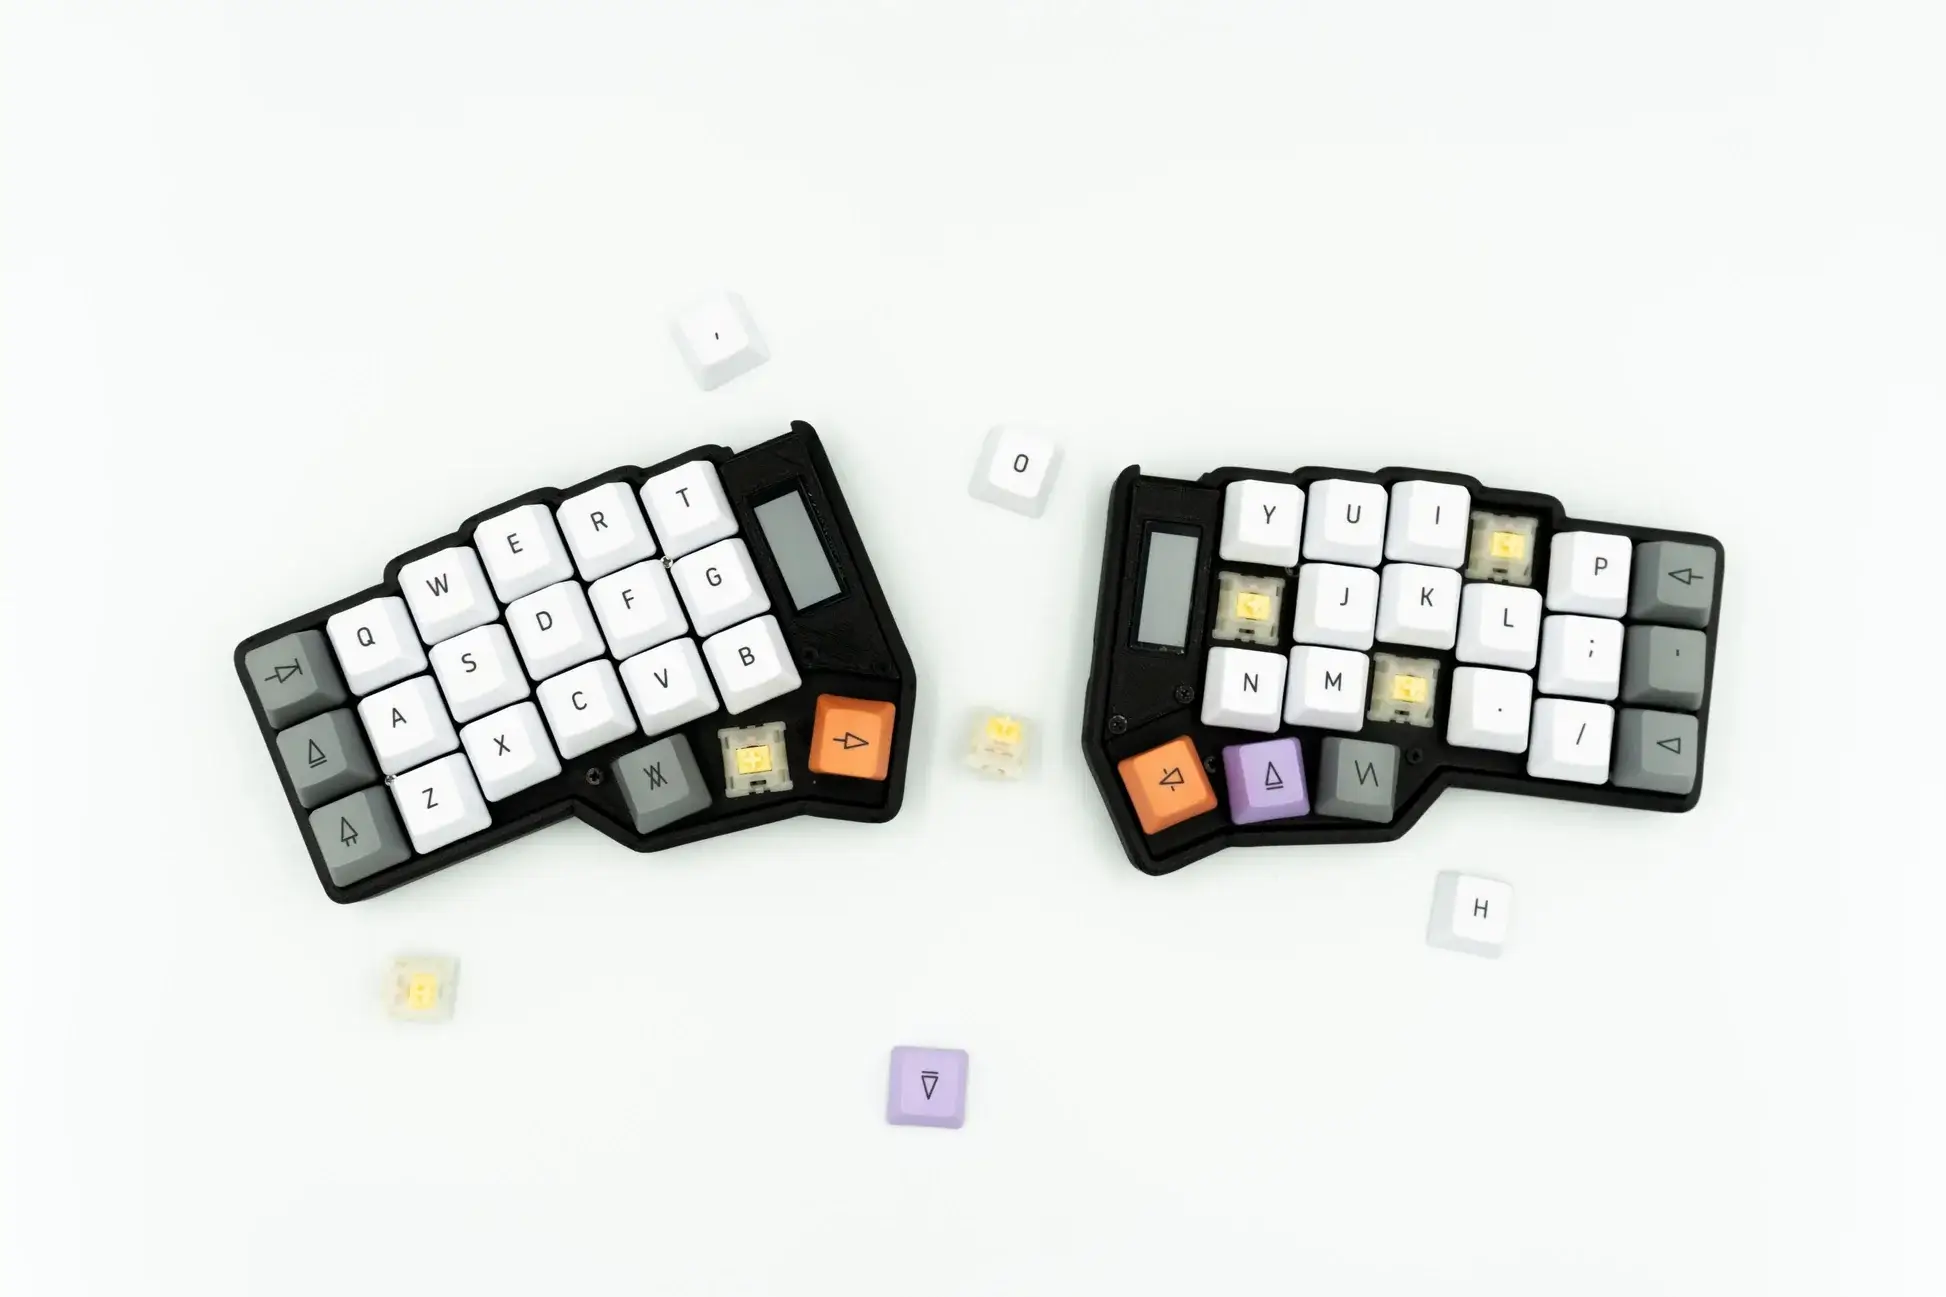
I decided that I would just stick my toe in and not dive too deep just in case I couldn't get used to these boards. I instead went with a Sofle, which is just like a Corne, but with a numrow, and two extra thumb keys.
 My very first split ergo keyboard, the Sofle
This was the absolute perfect gateway for me into this world of split keyboards. It didn't take me long to get used to it as well. I had used ortholinear (grid layout) keyboards before, so this was actually a little familiar. But I had one big obstacle to deal with before I could really get to using this keyboard.
ZMK
You know how you see boards like the corne and other tiny split ergonomic keyboards, and you just wonder, how is there enough keys on those boards? Well, that's another benefit of using such a keyboard. On regular keyboards, you have a dedicated key for each key that you may need, whether it's a numpad on the right of the board, a row for function keys, even number keys. The way split ergonomic keyboards work around this is quite cool too. Basically, the keyboards are programmable and utilise this called layers. The idea is exactly the same as the way you access capital letters on a regular keyboard: you hold down the shift key and suddenly all your alpha keys because capital letters instead of lower cased letters. But instead, you do this for a lot of different keys. The reason why you would want to do this, even though it comes at a cost of having somewhat of a learning curve, and having to rewire your brain to remember those layers, is to ultimately minimise the movement of your hands, hence the "ergonomic" in split ergonomic keyboards. The idea behind it is that, all these awkward streches to reach things like the numrow or the function keys, although easier on the brain, is not easier on the hands, especially if it is something that you would be doing frequently. Hence, the solution here is to keep keys at least only one row or column away from your homerow, and everything else on a layer.
So, enough about that, now question is, how? Well, luckily for me, even when using regular keyboards, I was making use of layering so that I could have extra keys on smaller boards and certain keys in positions that were more accessible to me. Where some regular keyboards use software like QMK, split ergonomic keyboards, or at least the ones I wanted to use, has ZMK. This is the magic that allows for all the features like layering, combos and even double taps and holds. I had to figure out how to use ZMK to program my board, and to also think about how to set up my board with a layout that works for me. ZMK is fantastic, it works over bluetooth and is packed with a buttload of features. Even on my regular keyboards, I was using mouse keys to emulate the mouse with WASD, media keys on layers, double taps and holds. So going down to lesser keys wasn't all too intimidating for me. In fact, I even found that the Sofle had too many keys for me. You can find the keymapping for my Sofle here.
The Endgame
Having overcome the immense barrier to entry on this hobby, I was two feet through the door already, and I wanted to keep going. And kept going I did.
My next board
I was on the lookout for another board. I knew I wanted to try two things: 1. Low-profile, and 2. Numrowless. I think the idea of ultimate portability was really appealling to me, and the two ways to get there was to try out low-profile "choc" switch boards instead of regular MX ones. This was appealling to me because it reminded me of the MacBook keyboards which I really like and it just looks so clean. In addition to that, I like the idea of having your numbers and symbols closer to the homerow, instead of stretching all the way up to the numbers row and having to look at what I'm pressing. I think having a numpad on a layer on my right hand, and having the symbols follow the numrow but on the homerow was really optimal for me. Even on my Sofle, I ended up using that as my keymap and not touching my numrow anymore. So with all this in mind, I set out to find my next split ergonomic keyboard.
The TOTEM
There was one last thing that I had to consider in looking for a low-profile, numrowless board. Remember the Corne that I showed you earlier? I mentioned that it was a 3x6 keyboard, meaning 3 rows and 6 columns on each side. As it turns out, that pinky stretch to reach the outer column is considered too awkward, and warrants some ergonomic adjustments, so there are many keyboards out there that have done away with them, in what is then a 3x5 keyboard. One of the big reasons I looked at them too is that they did look a lot cleaner and compact than a 3x6, and the thought of not having to do that awkward wrist movement anymore did sound nice, but I also had to consider if I could really realistically survive with a 34/36 key (crazy, right!? ) keyboard. I saw quite a few nice Temper keyboards on Aliexpress, for relatively cheap and I almost pulled the trigger.
During my time indulging in the hobby, I read a lot of stuff on reddit and watched a few videos on YouTube, but there was one particular keyboard that really stood out to me, both in terms of its layout, design, functionality and portability. It was so uniquely designed and well crafted, it really really stood out to me. That keyboard is none other than the TOTEM by GeistGeist.
Ain't she a beaut!?
I think at that time, just a few listings had started to come out selling the TOTEM for yet again a reasonable price, and based on how many there are now, I think that was the start of it getting really popular (as it should, it is a seriously well designed keyboard). The thought of going down to 38 keys (those two pinky keys put it right before my limit of too little keys) and no screen was quite daunting. I was worried that I would not be able to live with the board, especially because I had to now incorporate layers for gaming as well (moving wasd to match the homerow, moving qwer down to play LEAGUE OF LEGENDS). Despite all that, I decided to go ahead and pull the trigger, and honestly I have no regrets.
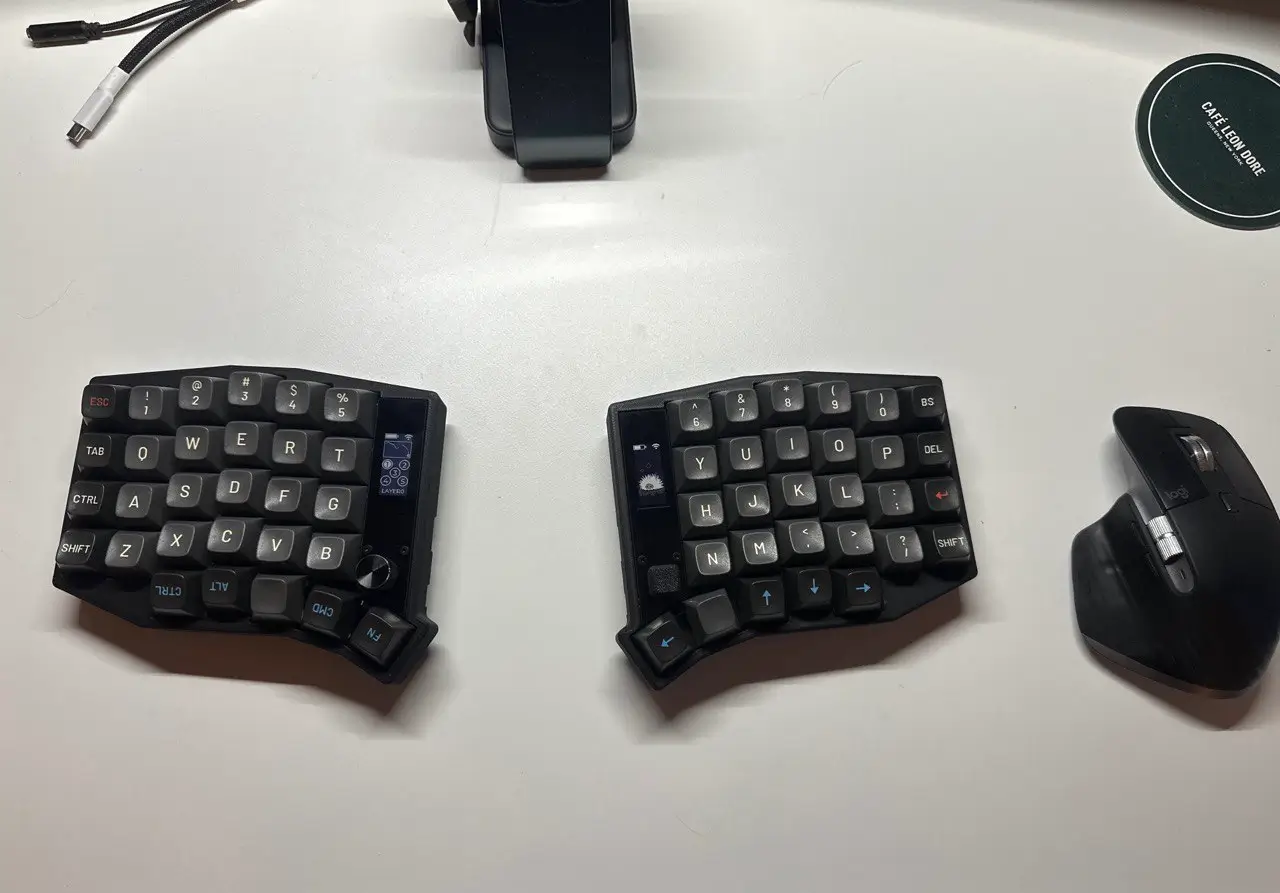
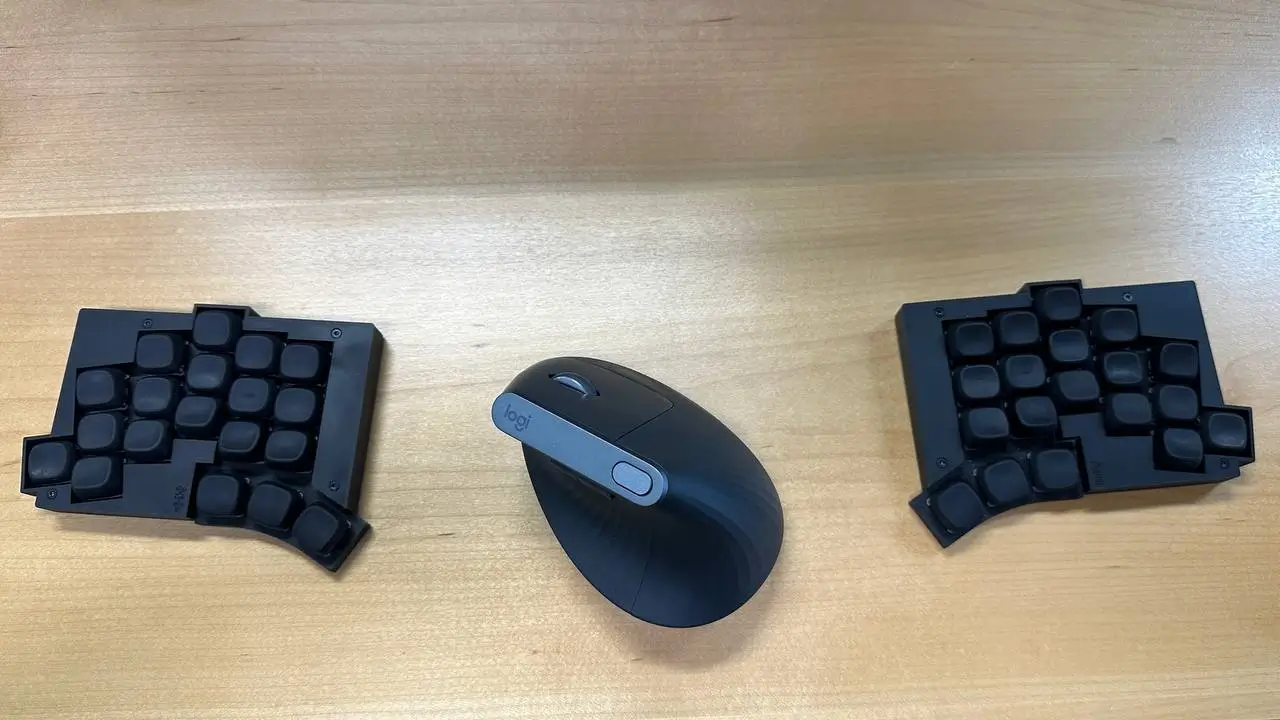 My endgame keyboard: the TOTEM
From the moment it arrived, I knew I loved it. The form factor was a major selling point, it was the single most portable keyboard that I had ever owned, to the point where I could literally carry it around in my pockets, and use it with just my phone (bluetooth too!). I got some Ambient Twilight switches for them, keeping up the silent switch era that I've grown to love. I had an issue procuring keycaps for them at first because this was my first time dealing with a choc-spaced keyboard, and low-profile switches. I ended up printing some KLP Láme keycaps for them (again, open-sourced), and I absolutely loved them too.
It took me a few iterations to finally land on a keymapping that works for me, but it is absolutely work for me now. Fully functional, and I never have to move my hand from the homerow, feels absolutely fantastic. I knew that this was it, my endgame keyboard.
Tenting
There was one more thing that I wanted to try with the TOTEM. There is a community PR that added a tenting capable bottom plate for the TOTEM, so I wanted to give that a try. I got a case printed from JLCPCB and tried it out. Although I really liked the tenting, I didn't really like the thickness that it adds to the TOTEM, kind of defeats the purpose of this ultra-portable board. It does have it's place in my rotation though, it's not altogether bad, it's just that I really like my ultra-slim ultra-portable board.
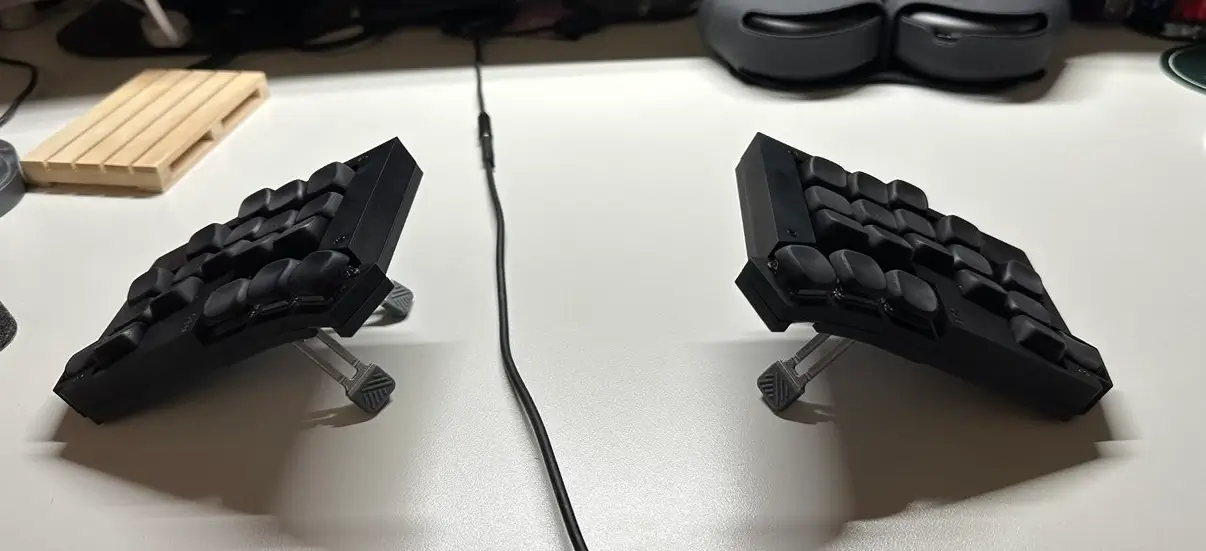 Tenting!
Unfortunately when swapping out the PCBs into the tenting case, the power switch on my left side got broken and I was stuck with a board that couldn't turn off. I tried some work-arounds like ZMK's soft off feature, but it just wasn't reliable enough. It was then that I decided to take another deeper dive into this hobby, it was time for me to build a TOTEM from scratch.
Building One From Scratch
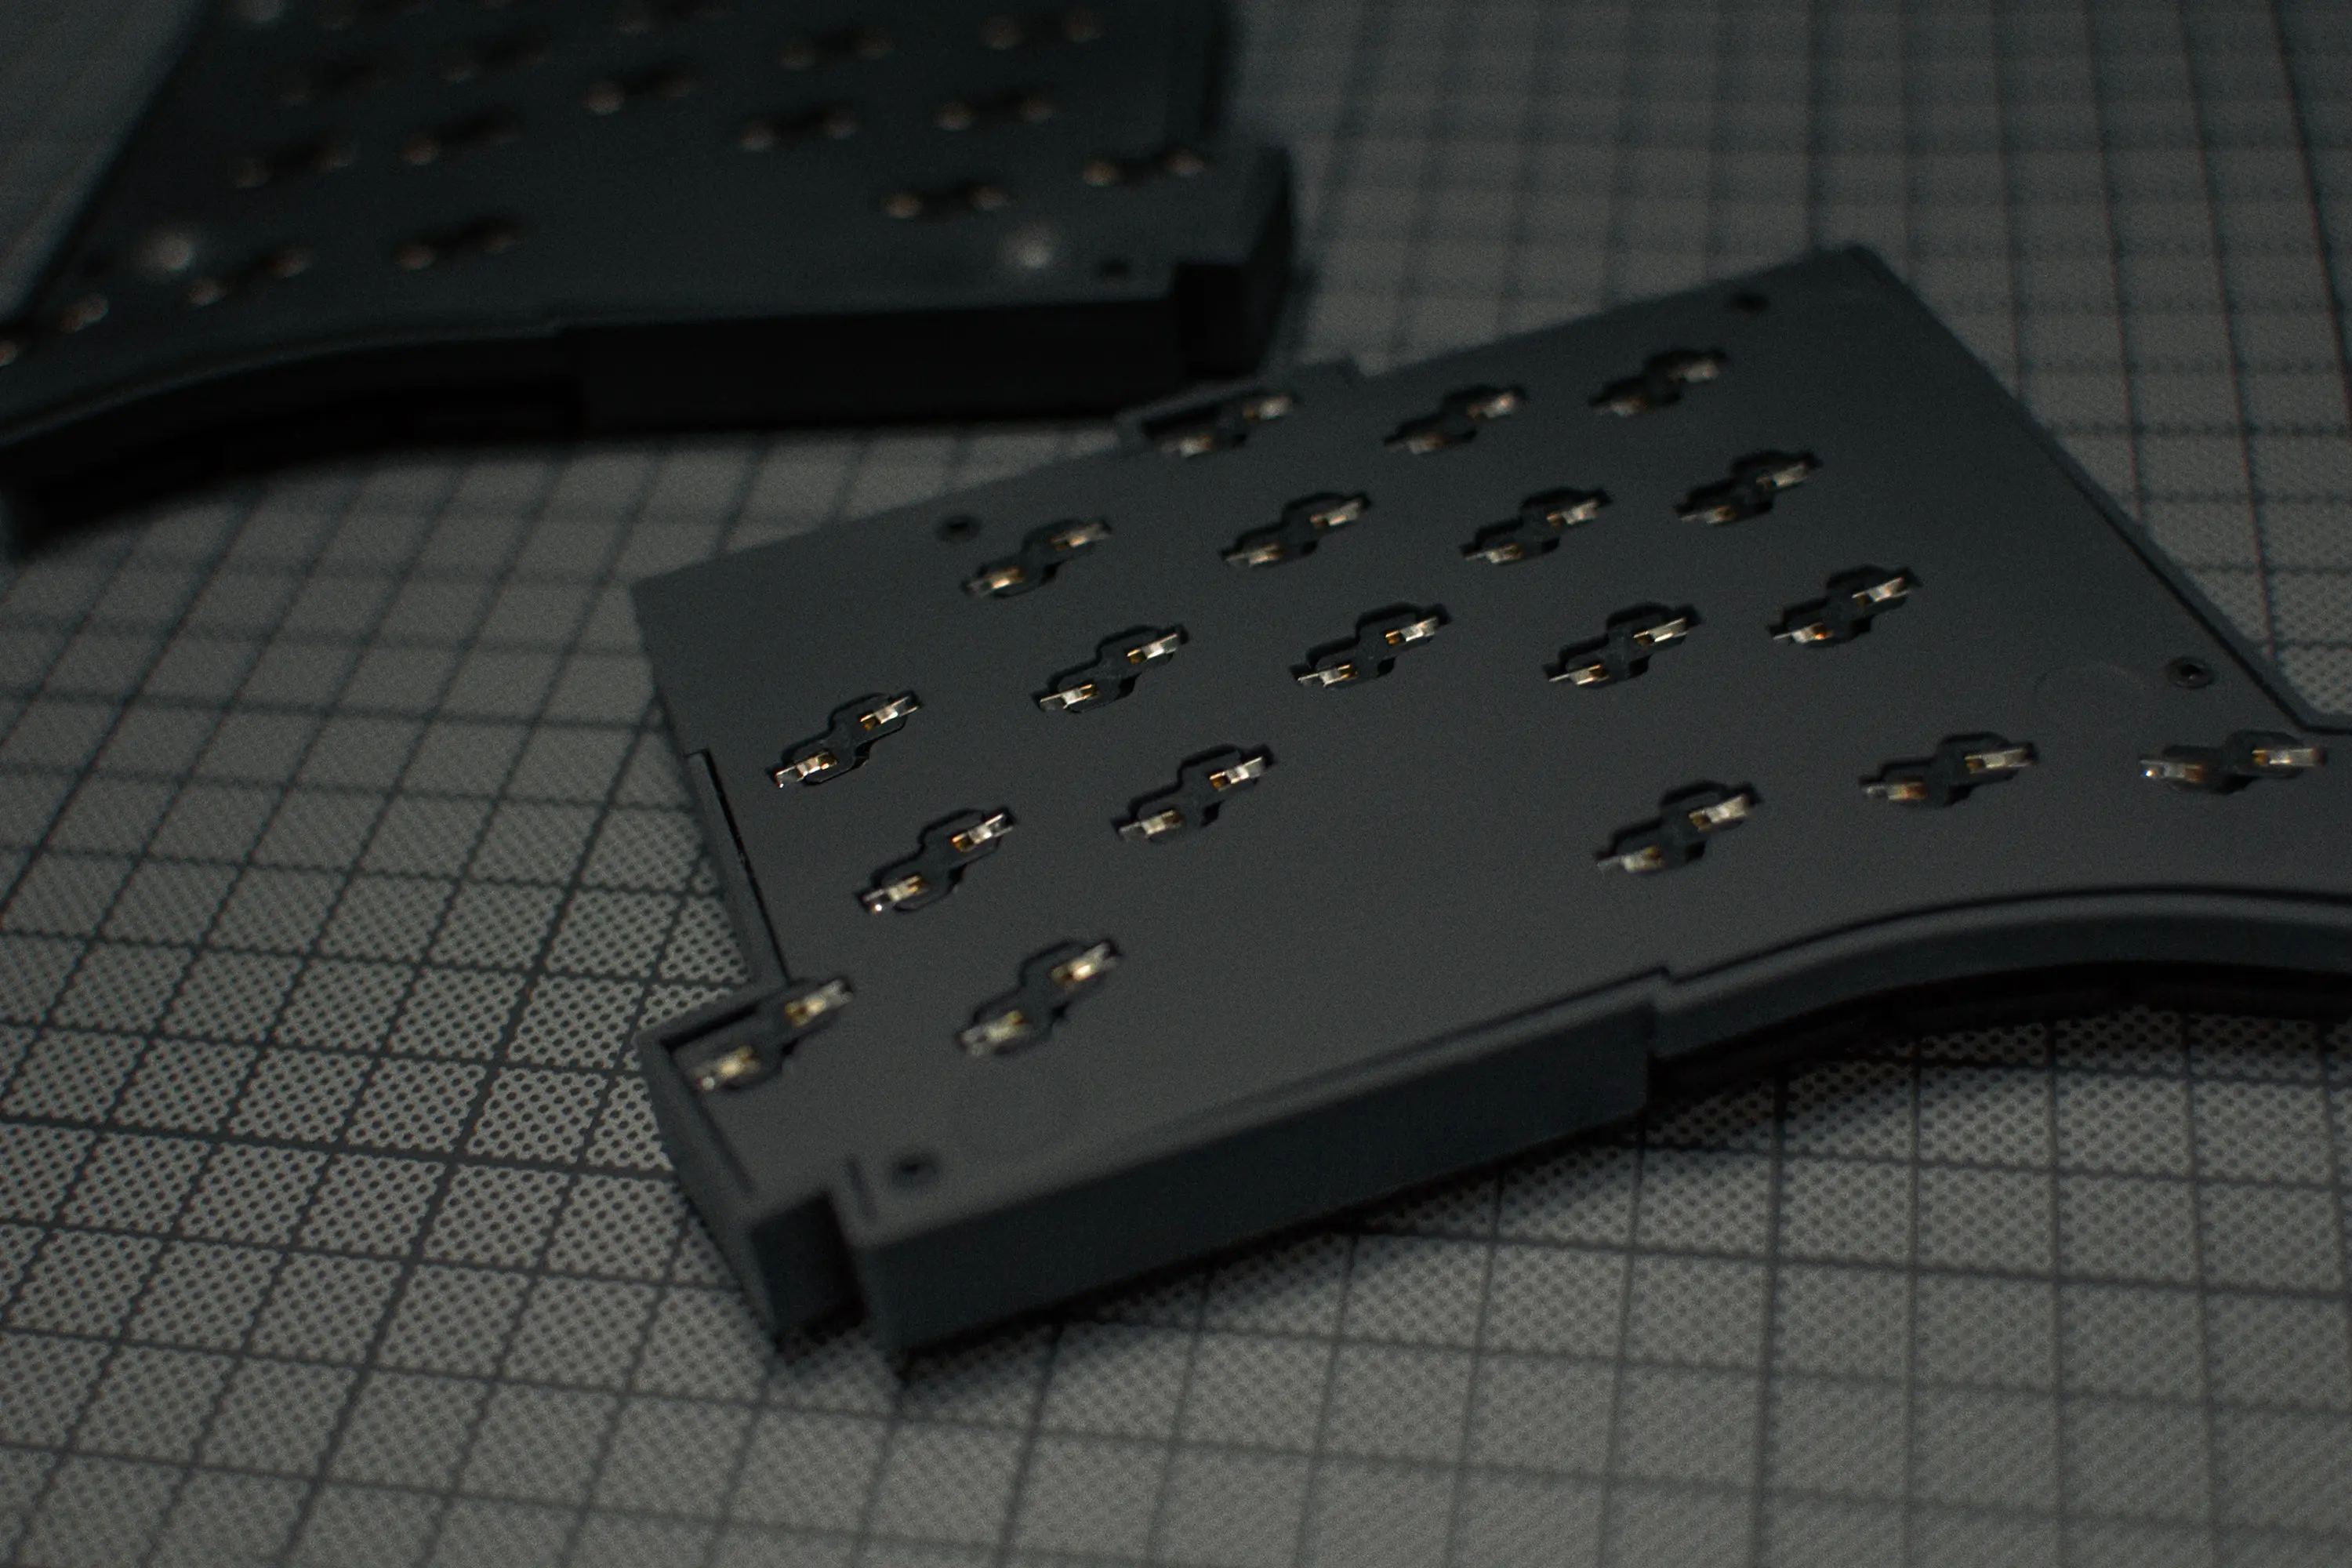
Luckily for me, I already had a little bit of soldering experience with my previous keyboards, so soldering wasn't entirely new to me. I ordered all the different parts, got the PCBs from JLCPCB, and got to work.
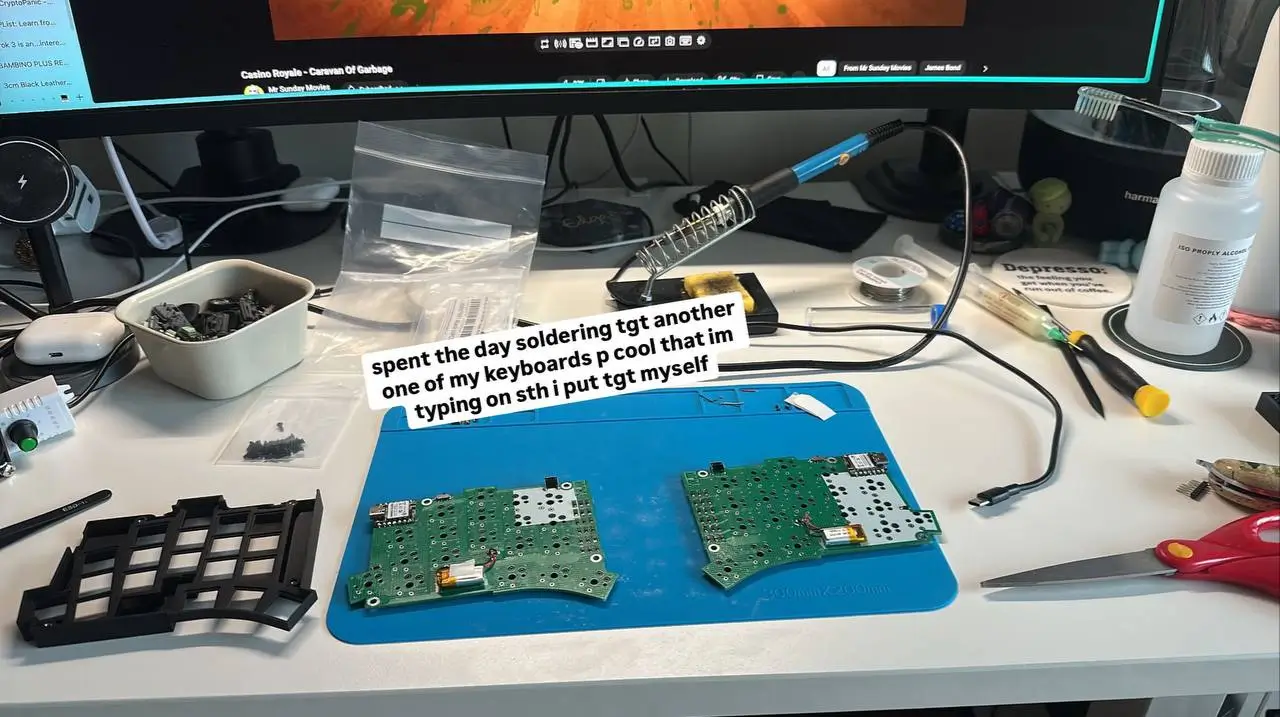 A day soldering
Honestly, soldering everything together wasn't too difficult, and in fact it was quite satisfying putting everything together with my own two hands. The only issues that I faced was positioning the switches properly to ensure that they fit the case properly, since the tolerances are quite tight. My reset switch is slightly too high, so its pushing on the case, but not too big a deal. I think that out of everything that I got out of this, I feel like this is the thing that I'm most proud of, and also the happiest about, because it means that I can basically get new TOTEM's anytime I want for quite little cost. In fact, the best part of this is that buying the parts in bulk makes everything cheaper, so now I have 4 more PCBs to put together, which is great.
So yeah, all in all, this was a really fun and insightful journey, and I'm left with this really beautiful and portable keyboard that I can use anywhere and everywhere, that I can build many more of in the future as well. Now everyone at work asks me about my weird keyboards and I'm always happy to share this hobby of mine now. I'm really super happy with my TOTEM and I'm happy to be building software with these!